
Last updated July 10, 2026
Garage Door Repair Maintenance Checklist for Dayton Homeowners
Here’s the truth that took us 17 years to fully appreciate: the most expensive repair call we make in Dayton isn’t a snapped torsion spring or a burned-out LiftMaster opener — it’s a door that’s jumped its track because a homeowner skipped a 30-second visual check for six straight years. At Pinnacle Garage Door Installation Greater Dayton, we’ve responded to over a thousand service calls across Oakwood, Kettering, Beavercreek, and the Miami Valley suburbs, and the pattern is unmistakable. The failures that cost $400–$800 to fix almost always start as $0 prevention items. This checklist is built from those actual service records — not generic manufacturer recommendations — calibrated specifically for Dayton’s freeze-thaw cycles, humid summers, and the particular wear patterns we see in local neighborhoods.
Quick Answer
A proper garage door maintenance checklist for Dayton homeowners includes monthly visual inspections, quarterly hardware tightening, bi-annual lubrication timed before winter and after spring thaw, and annual professional safety testing. Following this schedule prevents roughly 70% of the emergency calls we handle in the Dayton area, particularly off-track doors, rust-seized rollers, and opener strain failures caused by neglected hardware.
Table of Contents
- Monthly Maintenance Tasks (10 Minutes)
- Seasonal Maintenance Timeline for Dayton’s Climate
- What to Lubricate — and What Never to Use
- Safety Tests You Can Do Yourself
- The Five Sounds to Never Ignore
- DIY vs. Call a Pro: A Decision Matrix
- Common Mistakes to Avoid
- When to Call a Professional
- Frequently Asked Questions
Monthly Maintenance Tasks (10 Minutes)
The monthly check is where prevention lives. We estimate that 60% of our Garage Door Repair in Dayton calls in the Huber Heights and Riverside areas could have been avoided with this single habit. It takes ten minutes, requires no tools beyond a flashlight, and costs nothing.
Step 1: Visual track inspection. With the door closed, shine your flashlight along both vertical tracks. Look for dents, gaps between the track and wall, or accumulated debris. In Dayton’s older neighborhoods like Linden Heights or Five Oaks, we frequently see tracks knocked slightly out of plumb from decades of settling foundations or minor vehicle contact. A track that’s even ¼ inch out of alignment will eventually force rollers to bind and jump.
Step 2: Roller condition check. Examine each roller — there are typically ten on a standard residential door. Nylon rollers should show no cracks or flat spots; steel rollers should show no rust streaks running down the track. If you see rust, that’s Dayton’s humidity working on unlubricated metal, and it will seize within months.
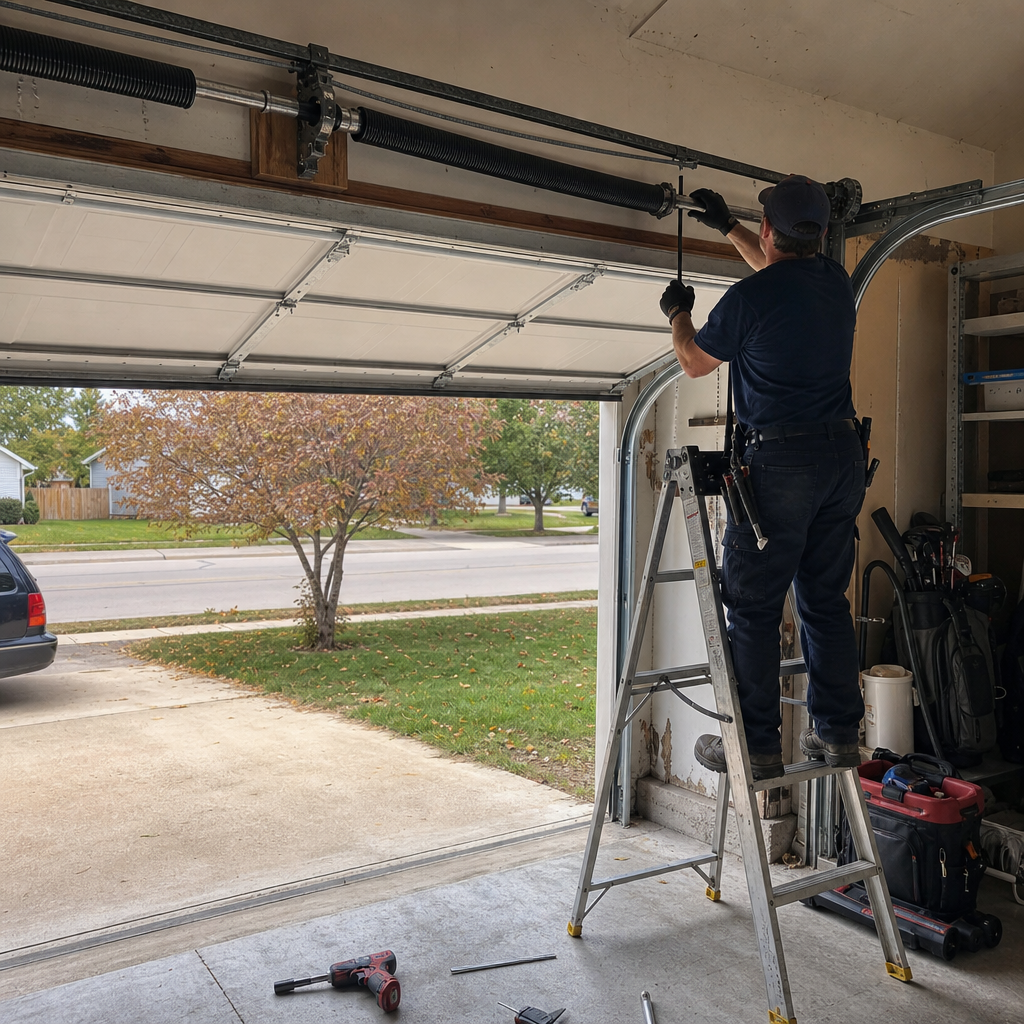
Step 3: Cable and spring visual scan. Look at the lift cables where they wrap around the bottom fixtures. Fraying — even a single unwound strand — means the cable is degrading. For torsion springs mounted above the door, look for gaps between coils when the door is closed; a gap indicates the spring has lost tension and is working your opener harder than designed. Do not touch springs or cables. These components store lethal tension. Visual inspection only.
Step 4: Weatherstrip check. Dayton’s temperature swings from single digits to 90°F+ stress the bottom rubber seal. Look for cracking, hardening, or gaps that let light through. A failed seal invites water intrusion during spring thaws, which rusts bottom fixtures and rots wooden door bottoms.
Step 5: Opener rail and chain/belt observation. Run the door up and down once, watching the opener’s drive mechanism. A chain should have roughly ½ inch of sag; a belt should track centered. Jerky motion or grinding from the opener head itself suggests gear wear, particularly common in 10+ year old Craftsman and Raynor units we service in Belmont and Walnut Hills.
Seasonal Maintenance Timeline for Dayton’s Climate
Dayton’s four distinct seasons each impose specific stresses on garage door systems. Our maintenance calendar reflects what we’ve learned from October ice storms, March freeze-thaw cycles, and July humidity that swells wooden doors in Shroyer Park and Patterson Park.
Fall (October): Pre-Winter Preparation
This is the critical window. Dayton’s first hard freeze typically arrives by late October, and any moisture trapped in components will expand and seize mechanisms.
- Lubricate all metal-to-metal contact points. Hinges, roller bearings (if steel), torsion spring coils, and lock hardware. Use a lithium-based grease or silicone spray, not WD-40.
- Test door balance. Disconnect the opener (pull the red release cord) and lift the door manually to waist height. It should stay put. If it falls or rises, the spring tension is off — call a pro before winter overworks your opener.
- Inspect and clear drainage. Ensure the concrete pad slopes away from the door and the seal sits flush. Pooling water from Dayton’s autumn rains freezes and lifts seals.
- Check exterior keypad and remote batteries. Cold reduces battery capacity; replace proactively.
Winter (January): Mid-Season Monitoring
Monitor only — don’t force adjustments in freezing temperatures.
- Listen for opener straining on cold mornings. If the door seems heavier, spring tension has likely dropped.
- Never use de-icing chemicals on the door bottom; they corrode aluminum and steel. Use a plastic scraper for ice buildup.
- If the door freezes to the ground, use a hair dryer on low heat — never force it open with the opener.
Spring (March): Post-Thaw Inspection
Dayton’s freeze-thaw cycle is brutal on foundations and, by extension, door alignments.
- Re-tighten all hardware. Track bolts, lag screws into the header, and opener mounting brackets loosen as the structure moves.
- Inspect for rust bloom. Check every steel component for orange staining that appeared over winter.
- Test force settings on the opener. Springs that weakened over winter may cause the opener to detect excess resistance and reverse unnecessarily.
- Clean photo-eye lenses. Road salt spray and grime from winter driving coat the sensors.
Summer (July): Humidity and Heat Management
- Wooden doors: Check for swelling that causes binding. Sand lightly if the door drags on the frame.
- Steel doors: Inspect for condensation on the interior surface, which indicates inadequate insulation or ventilation.
- Opener electronics: Ensure the motor head has clearance for airflow; overheating triggers thermal shutdowns.
What to Lubricate — and What Never to Use
This section alone would have prevented dozens of calls we’ve made in Dayton’s South Park and Oregon District neighborhoods. Lubrication mistakes are that common and that consequential.
The WD-40 problem: WD-40 is a water displacer and light solvent, not a lubricant. When homeowners spray it on nylon rollers or plastic hinges, it strips the plasticizers that keep those components flexible. Within a year, the nylon becomes brittle and cracks. We’ve replaced hundreds of rollers that were “maintained” with WD-40. In our 17 years of service, this is probably the single most common self-inflicted damage we encounter.
| Component | Recommended Product | Frequency | Never Use |
|---|---|---|---|
| Steel roller bearings | White lithium grease or silicone spray | Every 6 months | WD-40, motor oil |
| Hinge pins | White lithium grease | Every 6 months | WD-40, graphite |
| Torsion spring coils | Silicone spray (light coat) | Every 6 months | Grease (attracts dirt) |
| Chain drive | Manufacturer-specified chain lube | Annually | WD-40, grease |
| Belt drive | Clean only — no lubricant | As needed | Any lubricant |
| Track interior | Nothing — clean with rag only | As needed | Any lubricant (attracts debris) |
| Nylon rollers | Nothing — replace when worn | N/A | WD-40, any solvent |
Application technique matters: apply sparingly, operate the door twice to distribute, then wipe excess. Over-lubrication attracts Dayton’s road dust and pollen, creating abrasive paste.
Safety Tests You Can Do Yourself
Two federal safety standards apply to all automatic garage door openers manufactured after 1993: mechanical auto-reverse and photoelectric eye function. These aren’t optional features — they’re legally required, and testing them takes three minutes.
Test 1: Mechanical Auto-Reverse
- Place a 2×4 board flat on the floor, centered under the door path.
- Close the door using the opener button (not the remote).
- The door should reverse within 2 seconds of contacting the board.
- If it doesn’t, the force sensitivity is misadjusted or the opener’s internal clutch is worn. Do not attempt to increase force to override this. A door that won’t auto-reverse can crush a pet or child. Call for professional adjustment.
Test 2: Photoelectric Eye (Safety Sensors)
- Locate the two sensors mounted 4–6 inches above the floor on either side of the door track.
- Verify the LED indicators on both sensors are solid (not blinking). One sends, one receives; alignment is precise.
- Close the door, then wave a broomstick through the beam path.
- The door must reverse immediately. If it continues, the sensors are misaligned, dirty, or failing.
In Dayton’s older garages — particularly in neighborhoods like Dayton View or McPherson Town — we often find sensors knocked askew by lawn equipment or shifted by foundation settling. The 4–6 inch mounting height is also critical; higher mounting misses small children and pets.
Test 3: Manual Release Function
Pull the red emergency release cord with the door closed. It should disengage smoothly, allowing manual lifting. If it sticks or requires excessive force, the mechanism needs service. Re-engage by running the opener until the trolley reconnects — never force it.
The Five Sounds to Never Ignore
After 17 years and 1,186 reviews, Charles and his team have developed an ear for impending failures. These five sounds are your early warning system — address them promptly and you avoid the emergency call.
| Sound | What It Means | Component Failing | Typical Dayton Context |
|---|---|---|---|
| Loud bang, then door won’t lift | Torsion spring snapped | Spring (obviously) | Most common in February–March after cold stress; 7–12 year lifespan typical |
| Grinding/rumbling during travel | Roller bearings failing | Steel rollers seizing or nylon rollers disintegrating | Dust from Dayton’s construction zones accelerates wear |
| Squealing or screeching | Metal-on-metal friction | Dry hinges, worn bearings, or misaligned track | Often follows winter neglect; lubrication usually resolves |
| Clicking or popping at specific points | Door panel hinge binding or track obstruction | Hinge pin galling or debris in track | Maple seeds and helicopter debris jam tracks in June |
| Opener motor runs, door doesn’t move | Stripped opener gear or disconnected trolley | Opener internal gear set | Common in 15+ year old LiftMaster and Chamberlain chain-drive units |
The “loud bang” deserves emphasis: when a torsion spring breaks, it releases stored energy violently. If you’re home when it happens, you’ll know. If you’re not, you’ll return to a door that either won’t open or slams shut uncontrolled. Never operate a door with a broken spring — the opener will strain, potentially burning out its motor, and the door can fall freely. This is a same-day Garage Door Repair in Dayton call, and Pinnacle offers emergency service for exactly this scenario.
DIY vs. Call a Pro: A Decision Matrix
We’re straightforward about this: some maintenance is homeowner territory, some is strictly professional. The line is drawn at stored energy and structural load. Here’s our field-tested guidance.
| Task | DIY Safe? | Why / Why Not | Pinnacle’s Dayton Experience |
|---|---|---|---|
| Monthly visual inspection | Yes | No contact with loaded components | The #1 prevention tool we preach |
| Lubrication (hinges, roller bearings, springs) | Yes | Apply only — no disassembly | Use correct products; we carry them on our trucks |
| Photo-eye cleaning and alignment | Yes | Low voltage, no mechanical load | 80% of “broken” sensors just need cleaning |
| Weatherstrip replacement | Yes | Slide-on or retainer types are straightforward | Buy correct profile; we can identify by photo |
| Remote/keypad battery replacement | Yes | Consumer-level electronics | CR2032 for most; we stock common types |
| Spring tension adjustment or replacement | No — never | Lethal stored energy; professional tools required | We’ve treated injuries from DIY attempts; not worth it |
| Cable replacement | No | Under spring load; unpredictable release | Requires winding bars and knowledge of door weight |
| Track realignment | No | Affects entire door geometry; improper repair causes collapse | Precision measurement to 1/16 inch; pro territory |
| Opener gear replacement | No | Internal disassembly voids warranty; gear sets require press-fit tools | We stock gears for all eight brands we service |
| Bottom fixture or roller replacement | Borderline | Requires releasing cable tension first | Call us; we’ll walk you through whether it’s safe for your door type |
Charles Rodriguez’s standard: “If you’d need a tool you don’t own, or if a mistake could send something heavy toward your car or your family, that’s our job.”
Common Mistakes to Avoid
- Using WD-40 on anything. We’ve said it twice because we see it weekly. In Dayton’s Eastmont and Walnut Hills neighborhoods, where homeowners take pride in DIY maintenance, this single error accounts for more roller replacements than actual wear.
- Ignoring the door balance test. An unbalanced door forces the opener to do the spring’s job. Opener motors are designed for guidance, not lifting. We’ve replaced 12-year-old LiftMaster openers that failed prematurely because the door was 20 pounds out of balance for years.
- Skipping winter monitoring. Dayton’s January cold snaps reveal weaknesses that September hid. The door that “always worked fine” until February didn’t fail in February — it failed in October and nobody checked.
- Adjusting opener force settings to compensate for mechanical problems. This is dangerous. When a door gets heavier due to spring fatigue or track friction, some homeowners increase the opener’s down-force to get it to close. This overrides the safety reverse and converts a maintenance issue into a hazard.
- Neglecting the exterior keypad. Dayton’s humidity corrodes keypad contacts. A “dead” keypad often just needs contact cleaner or replacement — but homeowners who rely solely on remotes don’t discover the failure until they need it.
- Assuming all brands use the same parts. Wayne Dalton’s TorqueMaster spring system, for example, is proprietary and incompatible with standard torsion hardware. We’ve arrived to find well-meaning homeowners or handymen have ordered wrong parts and made the situation worse. We work on your brand — and we know which components are interchangeable and which aren’t.
- Waiting for complete failure. The grinding roller becomes the seized roller becomes the jumped track becomes the bent panel. Each stage multiplies the repair cost. In our experience, Dayton homeowners who follow this checklist spend 60–70% less on garage door service over a 10-year period.
When to Call a Professional
Call immediately if: a spring is broken or gapped; a cable is frayed or detached; the door is off-track or hanging unevenly; the opener motor runs but doesn’t move the door; or the auto-reverse safety test fails. These are not maintenance items — they’re active failures with injury risk.
Also call for annual professional inspection even if everything seems fine. We measure spring tension with calibrated tools, test opener force with digital gauges, and inspect internal opener components that aren’t visible. For Garage Door Installation in Dayton or existing system service, Pinnacle Garage Door Installation Greater Dayton offers free estimates — call (833) 348-5999. Charles Rodriguez or a member of his team will assess your system, explain findings in plain terms, and provide upfront pricing before any work begins. Same-day and emergency service available for urgent situations.
Frequently Asked Questions
Professional tune-up service in the Dayton area typically runs $89–$149 and includes spring tension testing, hardware tightening, lubrication with correct products, safety system verification, and opener force calibration. Call (833) 348-5999 for an exact quote — estimates are free.
Once annually is sufficient for most Dayton homes, though doors with heavy daily use (three or more cycles daily) benefit from semi-annual service. The critical timing is fall, before Dayton’s hard freeze season stresses components.
The product type matters more than brand. Use white lithium grease or silicone-based spray designed for garage doors. Avoid WD-40, motor oil, and graphite — they either attract debris, damage plastics, or lack staying power. We carry recommended lubricants on our service trucks and can supply the correct product during any service call.
Cold thickens lubricants, contracts metal components, and makes stiffened weatherstripping drag against the door frame. Dayton’s temperature swings from 20°F mornings to 40°F afternoons create repeated expansion-contraction cycles that loosen hardware. The noise is usually a symptom of normal seasonal stress — address it with proper winter-prep lubrication in October.
For openers under 10 years old, repair is usually more economical — typical repairs run $150–$350 versus $400–$700 for quality replacement installed. For openers over 15 years old, especially pre-2010 models lacking modern safety features, replacement often makes better long-term sense. We carry and service Garage Door Opener in Dayton systems across all major brands and can advise based on your specific unit’s condition.
Emergency garage door service is available, and we prioritize calls involving security exposure (door stuck open) or safety hazards (broken spring with vehicle trapped). For standard service requests in Dayton, Beavercreek, Kettering, and surrounding areas, we typically offer same-day or next-day scheduling. Call (833) 348-5999 for current availability.
The Bottom Line
Garage door maintenance in Dayton isn’t complicated, but it is specific. The homeowners who avoid emergency repairs are those who treat the monthly 10-minute inspection as non-negotiable, who lubricate before the first freeze rather than after the first failure, and who know the five warning sounds that precede expensive damage. This checklist — built from 17 years of actual service calls, 1,186 verified reviews, and the particular stresses of Dayton’s climate — gives you that prevention framework. The rest is consistency. And when a task exceeds your comfort or a failure appears despite your best maintenance, Pinnacle Garage Door Installation Greater Dayton is available for Pinnacle Garage Door Installation Greater Dayton home service with the direct accountability that comes from owner-operator involvement on every job.
Written by Charles Rodriguez, Owner & Lead Technician at Pinnacle Garage Door Installation Greater Dayton, serving Dayton since 2009.